After creating the administrative units, you can review them and modify their members and administrators from either the Azure portal or the Microsoft 365 admin center underRoles | Administrative units.
See Figure 3.20:
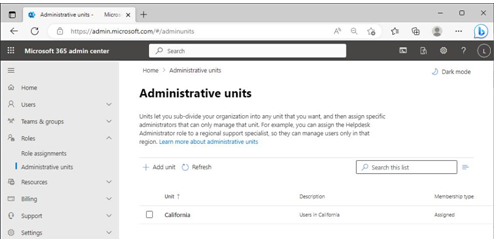
Figure 3.20 – Viewing administrative units
By selecting an administrative unit in the Microsoft 365 admin center, you can view or change its membership.
Note
The user interface for managing administrative units isn’t consistent. From the Microsoft 365 admin center, you can view an administrative unit and add users or groups to it, but you can’t do the inverse of navigating to a user or group object and adding it to an administrative unit. You can, however, perform both types of membership operations in the Azure portal.
While you can assign groups to administrative units, it does not automatically add the group member objects to the administrative scope—it only enables managing the properties of the group. You need to add the members of the group to the administrative unit directly in order for them to be in scope.
Note
Dynamic administrative units are a preview feature that allows you to use filters and queries to automatically populate administrative units. Like dynamic groups, dynamic administrative units can only have one object type (users or devices). Dynamic administrative units can only be configured in the Azure portal at this time.
As you define administrative structures and delegation for your organization, you’ll need to understand the limits of scoping controls. For instance, assigning an administrator to both an administrative unit as well as an Exchange or SharePoint Administrator role means that while they can only make modifications to users in their administrative unit, they can potentially make changes to application settings that affect users tenant-wide.
Note
Some applications, such as Exchange Online, support additional RBAC scoping controls to offer finer-grained service administration.
Planning and Implementing Privileged Identity Management
Privileged Identity Management (PIM) is the logical next step in RBAC and least-privilege identity management. While RBAC addresses what amount of privilege is needed to accomplish a task, PIM addresses the idea of how long this level of privilege is required.
Sometimes called Just-in-Time (JIT) access, PIM is a feature that allows users to request elevation to Azure AD roles or resources for limited periods of time to perform administrative tasks. At the end of the period, the roles and privileges are revoked, returning the user account to their pre-elevation access rights.
Note
PIM is an Azure AD Premium P2 or Enterprise Mobility + Security E5 feature.
PIM has a few key terms that you’ll need to understand:
- Assignment: This describeshow the user is granted the role. In the case of Eligible, it means a user has to perform an action to use the role, such as requesting elevation or asking for approval. In the case of Active, it means the user doesn’t have to do anything to request the role.
- Duration: This describeshow long a particular assignment is active. It can be permanent (no expiration date) or time-bound, meaning it will be active only for a specific period of time.
For example, John is a full-time employee and needs to periodically be able to perform functions in the Exchange Administrator role. His assignment would be Eligible, while the duration would be permanent.
In another example, Kay is a temporary worker whose contract ends on July 31. She periodically needs to be elevated to be able to perform user administration functions. Her assignment would be Eligible, while the duration would have an end date of July 31.
PIM for Azure AD roles and Azure resources can be configured in the Azure portal on the Identity Governance blade, as shown in Figure 3.12:
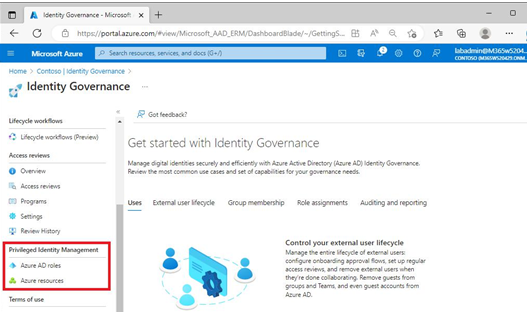
Figure 3.21 – Privileged Identity Management
Next, you’ll look at configuring a simple assignment.
Leave a Reply