To enable users to sign in with Microsoft Authenticator, you need to configure the authentication policy. The authentication policy is shared across the tenant, though different authentication methods are scoped for groups of users.
Configuring and managing the policy requires an account with the Global Administrator or Authentication Administrator role:
- Navigate to the Azure portal (https://portal.azure.com).
Exam Tip
While the current (as of this writing) version of the exam was developed before full parity of the Entra admin center was delivered, it’s important to understand that interim exam updates may include references to the Entra admin center (https://entra.microsoft.com). Things such as menu items or configuration options are located in slightly different locations (from the left-hand menu navigation perspective), though they render the current Azure portal information in the main content window.
2. Select Azure Active Directory | Security | Authentication methods and then select Policies, as shown in Figure 5.10:
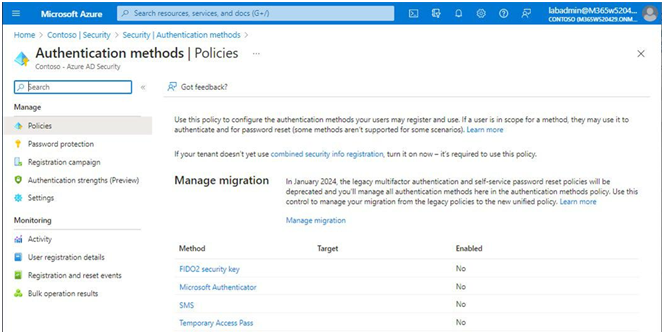
Figure 5.10 – Authentication methods
3. Select Microsoft Authenticator.
4. On the Enable and Target tab of the Microsoft Authenticator settingspage, slide the Enable toggle to On, as shown in Figure 5.11:
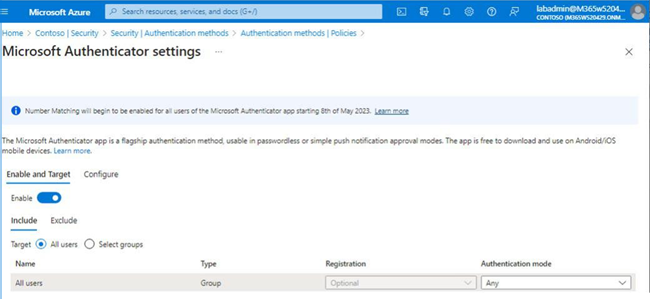
Figure 5.11 – Enabling Microsoft Authenticator
5. Using the Include and Exclude tabs, specify which users the policy settings will apply to. Select the All users radio button to include all users in the policy or choose the Select groups radio button to specify which groups will be included or excluded. Each group can have a separate Authentication mode value selected, including Any (default), Passwordless, or Push. Choosing Push as the option prevents the use of the passwordless phone sign-in credential.
6. Click Save to update the policy configuration.
After configuring the policy, users will need to register any devices to be used for passwordless authentication.
Registering Devices
Before users can log in to the service using Microsoft Authenticator, they will need to register their devices. If they’ve already registered for multifactor authentication, nothing else needs to be done.
If a user who has not registered signs in to the Microsoft 365 portal, they are greeted with aMore information required dialog as part of the sign-in process, as shown in Figure 5.12:
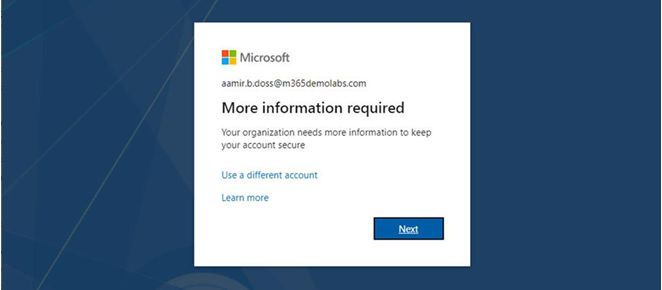
Figure 5.12 – More information required
During the process, they are redirected to download the Microsoft Authenticator app, as shown in
Figure 5.13:
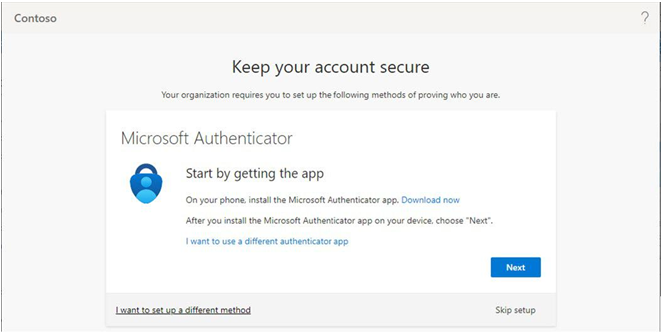
Figure 5.13 – Keep your account secure page
After they click Next, they are prompted to launch the Microsoft Authenticator app and add an account. Following the directions on the mobile device, they should launch a camera window that allows them to take a picture of a unique QR code, linking their device to their account, as shown in Figure 5.14:
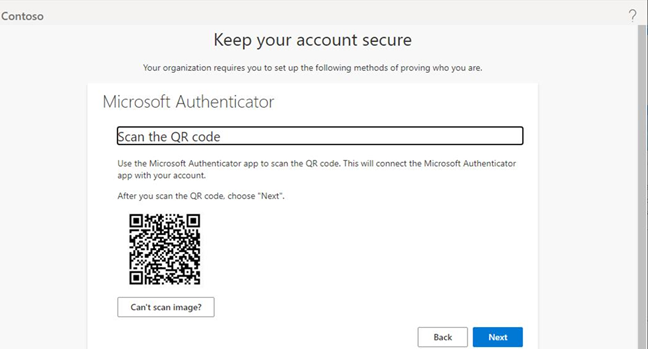
Figure 5.14 – Registering a device
Once the device has been linked, the enrollment process will ask the user to confirm a code between the registration screen and their Microsoft Authenticator app. After completing the challenge, users should be presented with a confirmation screen, similar to the one shown in Figure 5.15:
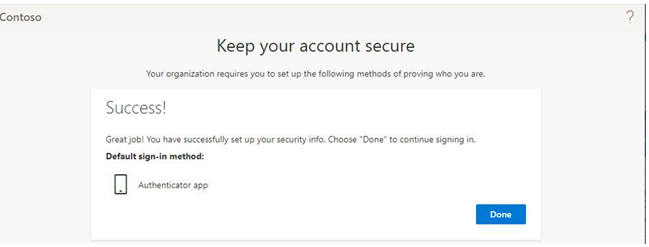
Figure 5.15 – Authenticator registration screen
The final step for the user for full passwordless sign-in from the Microsoft Authenticator app is to configure the device itself. In Microsoft Authenticator, the user can open the app and select Enable phone sign-in, as shown in Figure 5.16:
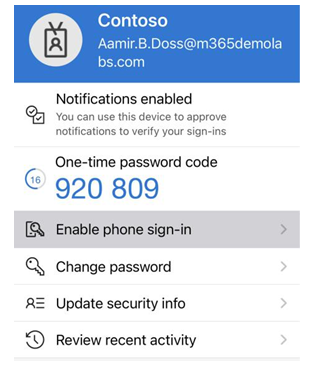
Figure 5.16 – Microsoft Authenticator Enable phone sign-in
This will start a process to configure the device for passwordless sign-in. After configuration, the user can choose to log in with an app instead, triggering the phone authentication notification on their device. See Figure 5.17:
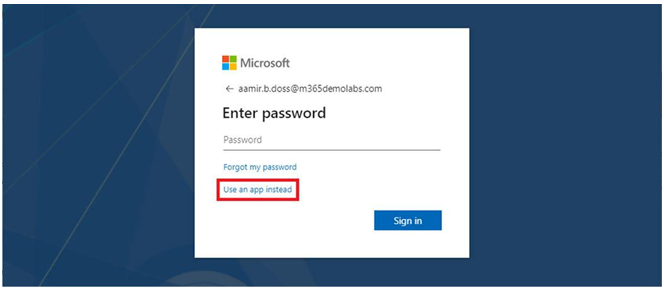
Figure 5.17 – Launching passwordless sign-in
The user then completes the logon challenge in the Microsoft Authenticator app to finish logging in to Microsoft 365.
Configuring FIDO2
When setting up FIDO2 -based authentication, you’ll follow a similar process as with Microsoft Authenticator—updating the authentication policy to allow the method and then instructing users to self-register their security keys.
Leave a Reply