Roles can be easily managed within the Microsoft 365 admin center by expanding the navigation menu, expanding Roles, and then selecting Role assignments, as shown in Figure 3.2:
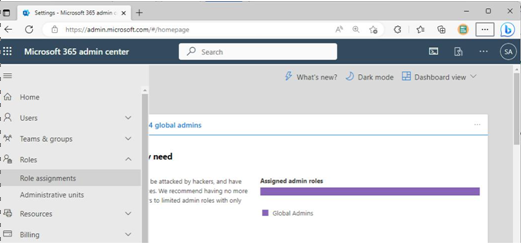
Figure 3.2 – Role assignments
Roles are displayed across four tabs—Azure AD, Exchange, Intune, and Billing—on the Role assignments page, as shown in Figure 3.3:
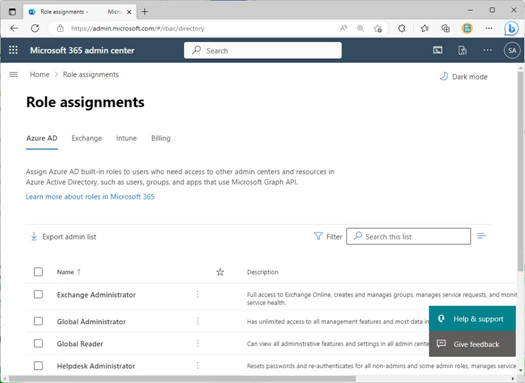
Figure 3.3 – Role assignments page
To add people to a role, simply select the role from the list, choose the Assigned tab, and then add either users (click Add users) or groups (click Add groups) to the particular admin role, as shown in Figure 3.4:
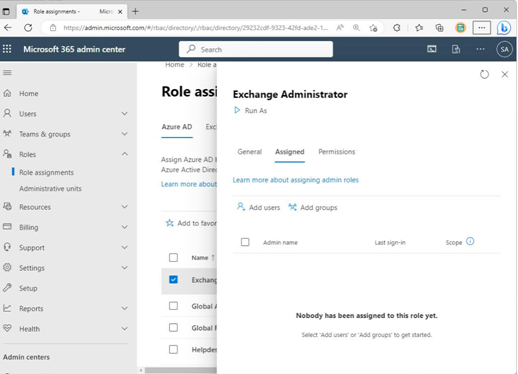
Figure 3.4 – Making role assignments
Depending on the roles being assigned through this interface, you may be able to use Microsoft 365 groups, role-assignable security groups, or mail-enabled security groups.
Managing Role Groups for Microsoft Defender, Microsoft Purview, and Microsoft 365 Workloads
Now that you’re familiar with role groups and concepts, let’s look at managing roles for some specific workloads and feature areas of Microsoft 365:
- Microsoft Defender
- Microsoft Purview
- Microsoft 365 workloads
You will next look at some of the nuances of managing roles in each of these areas.
Microsoft Defender
All of the Microsoft Defender roles can be administered from the Azure portal (https://portal. azure.com). Both the Microsoft 365 Defender and Azure portal interfaces also provide the ability to define custom roles or role groups.
Note
Microsoft 365 Defender also has a new RBAC model available. As of June 2023, the Microsoft 365 Defender RBAC model is in preview and is subject to change. Not all features and rights are present in the new RBAC model and it is not yet suitable for production. If you switch as part of your study program, you may lose out on the opportunity to perform some activities. The exam will focus on the current model that is generally available. You should perform any study exercises with the default RBAC model.
Microsoft 365 Defender users can be configured to use either the global Azure AD roles or custom roles from the Microsoft 365 Defender portal. When using Azure AD’s global roles to assign
permissions for Microsoft 365 Defender, it’s important to note that the Azure AD roles will grant
access to multiple workloads.
By default, Global Administrators and Security Administrators have access to the Microsoft 365 Defender features. To delegate administrative duties, you can use custom roles.
To create a custom role, follow these steps:
- Navigate to the Microsoft 365 Defender portal (https://security.microsoft. com) with an account that is either a member of the Global Administrators or Security Administrators group.
2. In the navigation menu, select Permissions, as shown in Figure 3.5:
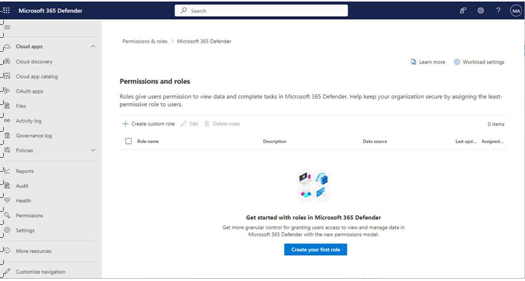
Figure 3.5 – Microsoft 365 Defender permissions
- Click Create custom role.
- On the Basics page, enter a role name and click Next.
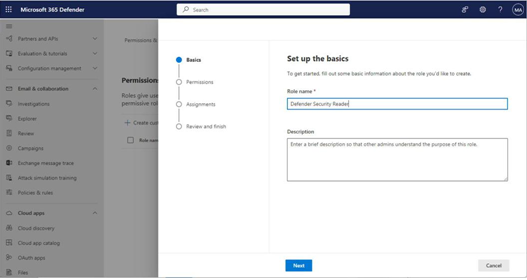
Figure 3.6 – Creating a new custom role
5. Select permissions from the available permissions groups. For example, select Security operations, then choose the Select all read-only permissions radio button and click Apply, as shown in Figure 3.7:
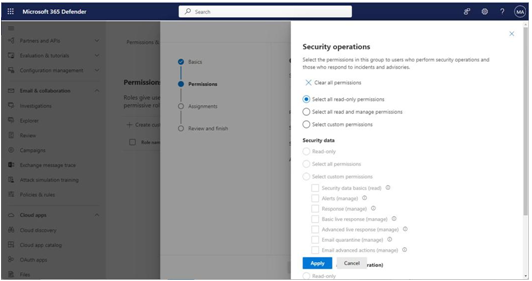
Figure 3.7 – Selecting permissions
- When you’ve finished, click Next.
- On the Assignments page, click Add assignment. See Figure 3.8:
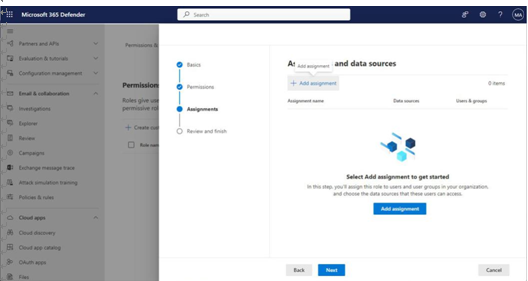
Figure 3.8 – Adding user and data assignments
- On the Add assignment page, enter an assignment name for this permissions assignment.
- On the Add assignment page, select which data sources this assignment applies to. You can select Choose all data sources (including current and future supported data sources) to make a broadly scoped role or select specific individual data sources.
- On the Add assignment page, select which users or groups will be configured with this assignment. Click Add when finished. See Figure 3.9:
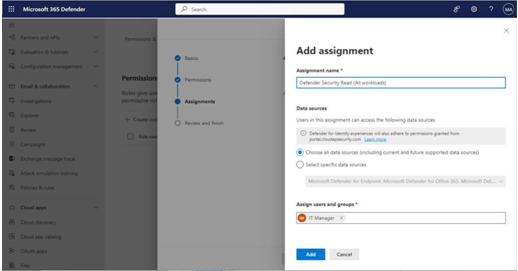
Figure 3.9 – Selecting assignment options
- Add more assignments if necessary and then click Next to continue.
- On the Review and finish page, confirm the selections and then click Submit, as shown in Figure 3.10:
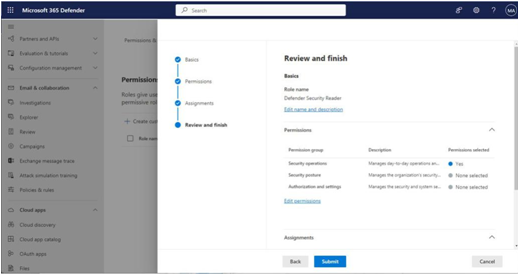
Figure 3.10 – Confirming configuration
Once the roles and assignments have been configured, users can log in and view or manage the features to which they’ve been assigned.
Further Reading
For more information on the deeper nuances of the Microsoft 365 Defender custom roles and available permissions, see https://learn.microsoft.com/en-us/microsoft-365/ security/defender/custom-permissions-details.
Next, you’ll explore the roles and permissions for Microsoft Purview.
Leave a Reply