Before you begin the installation, you should make sure that the server where the provisioning agent will be installed can communicate with the various Azure AD services. Table 4.3 highlights ports and URLs that are required for the cloud sync agent to function correctly:
| Endpoint | Port/Protocol | Description | |
| *.msappproxy.net | 443/HTTPS | Azure Application Proxy cloud | |
| *.servicebus.windows.net | service endpoints | ||
| crl3.digicert.com | 80/HTTP | Certificate Revocation List | |
| crl4.digicert.com | (CRL) endpoints | ||
| ocsp.digicert.com | |||
| crl.microsoft.com | |||
| oneocsp.microsoft.com | |||
| ocsp.msocsp.com | |||
| Endpoint | Port/Protocol | Description |
| login.windows.net | 443/HTTPS | Agent configuration and registration |
| secure.aadcdn. | ||
| microsoftonline-p.com | ||
| *.microsoftonline.com | ||
| *.microsoftonline-p.com | ||
| *.msauth.net | ||
| *.msauthimages.net | ||
| *.msecnd.net | ||
| *.msftauth.net | ||
| *.msftauthimages.net | ||
| *.phonefactor.net | ||
| enterpriseregistration. | ||
| windows.net | ||
| management.azure.com | ||
| policykeyservice.dc.ad. | ||
| msft.net | ||
| ctldl.windowsupdate.com | ||
| www.microsoft.com/pkiops | ||
| ctldl.windowsupdate.com | 80/HTTP | Agent configuration and registration |
Table 4.3 – Required endpoints for Azure AD Connect Cloud Sync service
To begin configuring Azure AD Connect Cloud Sync, follow these steps:
1.Log on to a server where you wish to install the Azure AD Connect Cloud Sync provisioning agent.
2. Navigate to the Azure portal (https://portal.azure.com) and select Active Directory | Azure AD Connect.
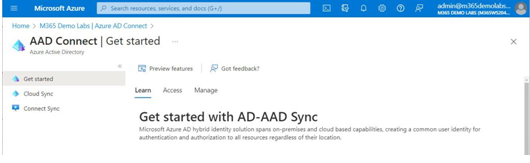
Figure 4.25 – Azure AD Connect in the Azure portal
3. From the navigation menu, select Cloud Sync.
4. Under Monitor, select Agents.
5. Select Download on-premises agent.

Figure 4.26 – Download on-premises agent for Azure AD Connect Cloud Sync
6. On the Azure AD Provisioning Agent flyout, select Accept terms & download to begin the download.
7. Open the AADConnectProvisioningAgentSetup.exe file to begin the installation.
8. Agree to the licensing terms and click Install to deploy the Microsoft Azure AD Connect provisioning package.
9. After the software installation is complete, the configuration wizard will launch. Click Next on the splash page to begin the configuration.
10. On the Select Extension page, choose the HR-driven provisioning (Workday and SuccessFactors) / Azure AD Connect Cloud Sync radio button and click Next. See Figure 4.27:
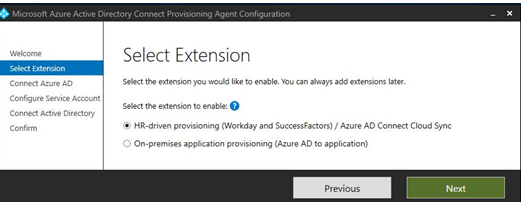
Figure 4.27 – Azure AD Connect Cloud Sync Select Extension page
11. On the Connect Azure AD page, click Authenticate to sign in to Azure AD.
12. On the Configure Service Account page, select the Create gMSA radio button to instruct the setup process to provision a new gMSA. Enter either Domain Admin or Enterprise Admin credentials and click Next. See Figure 4.28:
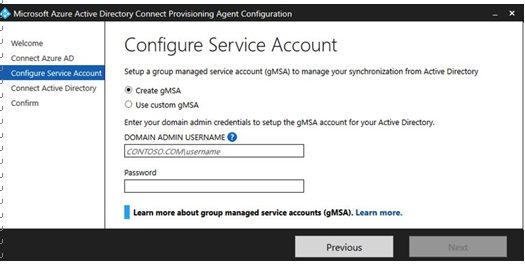
Figure 4.28 – Configure Azure AD Connect Cloud Sync service account
13. On the Connect Active Directory page, click Add Directory and provide the domain credentials to add the directory to the configuration. When finished, click Next. See Figure 4.29:
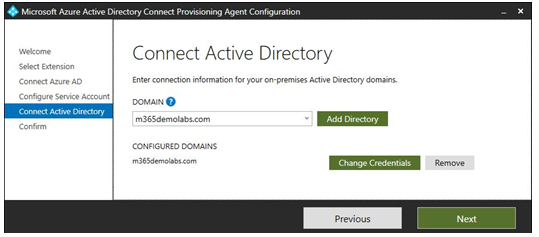
Figure 4.29 – Adding a directory to Azure AD Connect Cloud Sync
14. Review the details on the Agent configuration page and click Confirm to deploy the provisioning agent. When finished, click Exit.
After the agent has been deployed, you will need to continue the configuration in the Azure AD portal.
Leave a Reply