You can configure PIM for a role by following this procedure:
- Navigate to the Azure portal (https://portal.azure.com). Enter Identity Governance into the search bar and select the Identity Governance option.
2. Under Privileged Identity Management, select Azure AD roles (or Microsoft Entra roles).
3. Under Manage, select Roles. See Figure 3.22:
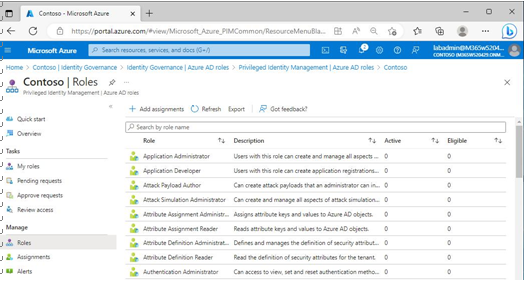
Figure 3.22 – Role assignments
4. Select the role you wish to configure an assignment for, such as the Exchange Administrator role.
5. Click Add assignments.
6. On the Membership tab of the Add assignments page, under Select member(s), click No member selected to bring up the Select a member flyout.
7. On the Select a member flyout, choose one or more members and click Select, as shown in Figure 3.23:
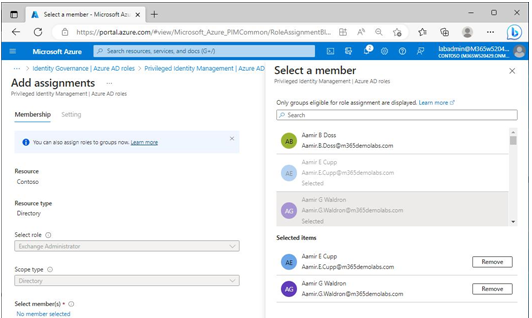
Figure 3.23 – Selecting members
8. On the Add assignments page, click Next.
9. On the Setting tab of the Add assignments page, select an assignment type, such as Eligible. In this instance, if you want the users to be eligible to request elevation for the duration of the time period their account is enabled, select Permanently eligible.
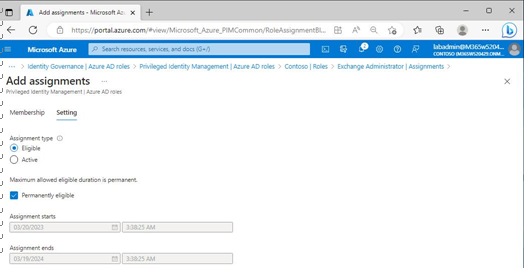
Figure 3.24 – Configuring assignment type and eligibility duration
10. Click Assign.
From this point, the users that you have selected can activate their role assignment from the Azure portal.
Reviewing Role Assignments
You can review all of the assignments that you’ve created in the Azure portal. To view the role assignments, navigate to the Identity Governance blade and then select Azure AD roles | Azure AD roles | Assignments. See Figure 3.25:
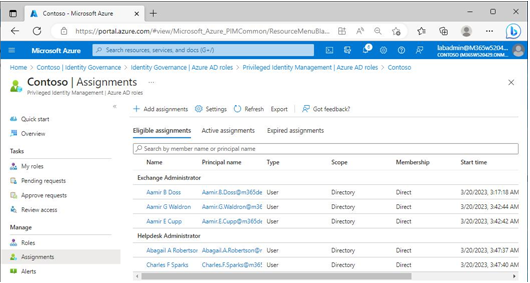
Figure 3.25 – Viewing role assignments
On the Eligible assignments tab, assignments are listed under their respective Azure AD role. The Active assignments tab lists individuals with various role assignments, including their end dates andwhether they’re permanent. Review Figure 3.26 for an example of active assignments.
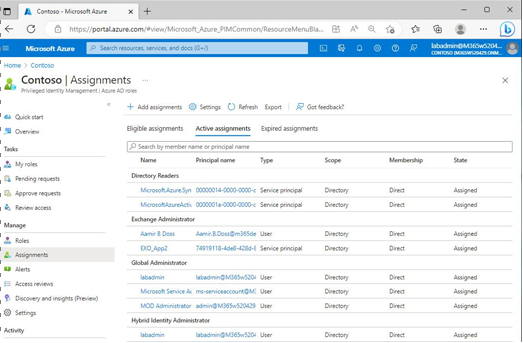
Figure 3.26 – Viewing active assignments
Notice that the assignments can include both users as well as application security principals.
Leave a Reply